Lots More Etsy
I've been posting a bunch of new items to my Etsy Shop over the past week. Some have been items I've been working on for a while and just finished. I've actually had them for a long while, I did a post about them back in February you can see here. I hit a snag with these items where I just could not figure out a easy way to make a bail for them. This was my original concept piece and I did a custom piece which I sold on esty that I designed a custom bail that tube riveted to the wood. The bail not only acts a a way to hang the piece it also acts as a cover for the knots at the beginning and end of the wire. The cap worked great but it took a bit to much finessing for me to want to try and do it for the other production pieces. I wanted a quick and easy, but still good looking, and custom technique for each one.
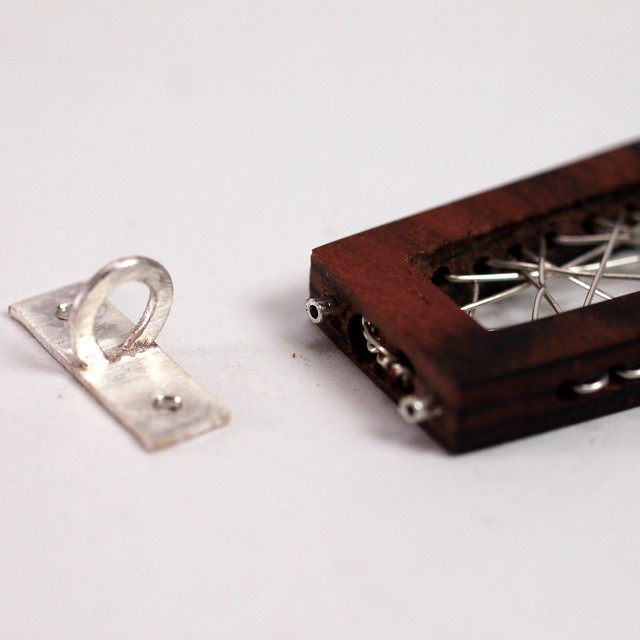
Here is the origingal bail design.

Looks great and works great, just takes time. I finally decided on a new design that I knew would be fast yet still look good. I decided to invest in a small propane torch that I could solder with some degree of control. Up until now if I wanted to solder something I used my camp stove burner which I have no control, it was basically on and off. Having control while soldering silver is really important, silver can be very unpredictable and it hard to judge if you are close to melting it before it melts. Using a propane torch for such small pieces would still be difficult but it can be done.
Here is a picture showing the top of the rosewood frame which has a small carved out nook which hides the beginning and end knot of the wire. The tubes fit snugly into holes drilled into the wood and an epoxy resin is used to keep them in place. You can see the rough bail on the left which I soldered a flattened piece of sterling wire. I then use more epoxy to hold the bail to the wood and then I use a sharp punch to ream the inside of the tube to rivet it to the bail. Using a tube to rivet in this situation is necessary, I would not be able to use a wire rivet because hammering it might damage the wood.
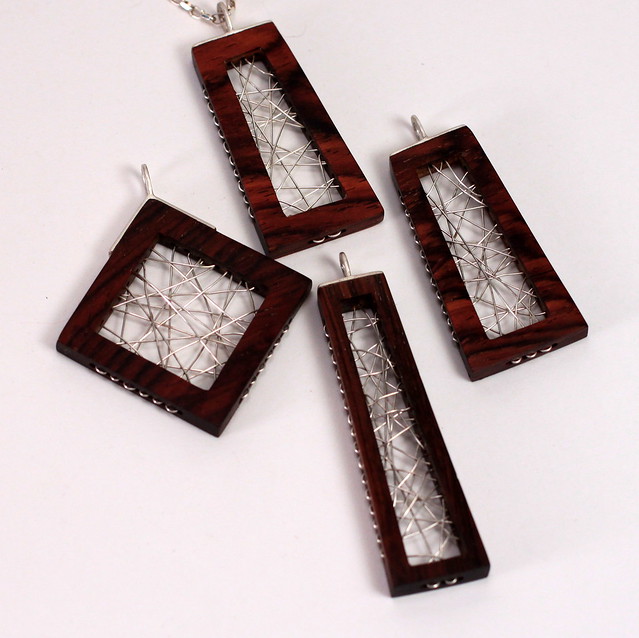
I was able to make four bails in about an hour, where using my original bail design would have probably taken me a whole day.
Here are the four pieces I have posted to my shop with the new bail design.

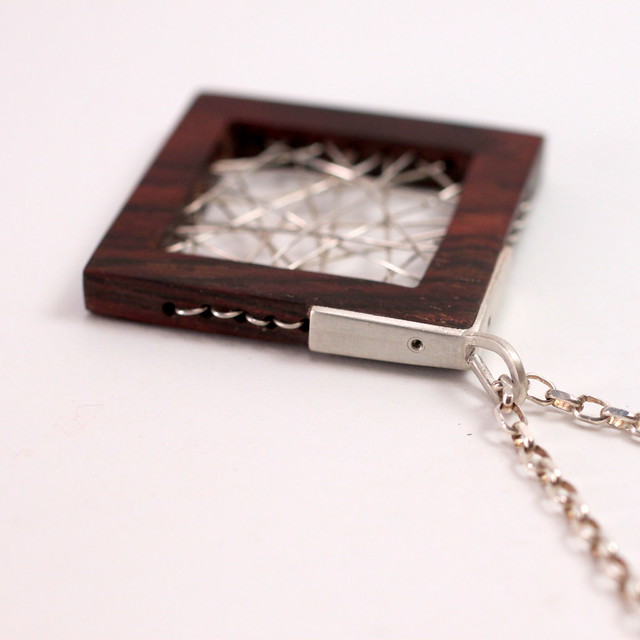
The square piece was a little challenging. The little nook hiding the ends of the wire were on the side of the piece and to make the bail symmetrical I needed to cover some of the stitching on the other side as well. There is actually a groove filed out on the back side of the bail to accommodate the wire. The tubes had to be placed after the bail was glued to the wood, but I think the placement of the tubes in this piece make it the strongest of all of them.
I'm planning on making more of these now that I have the bail figured out. I'm probably going to be doing some more soldering as well now that I have that figured out.
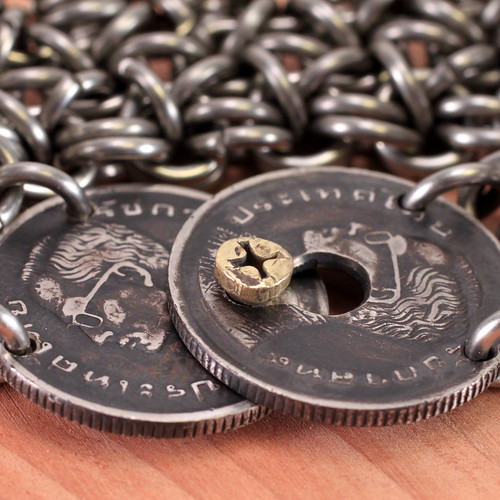
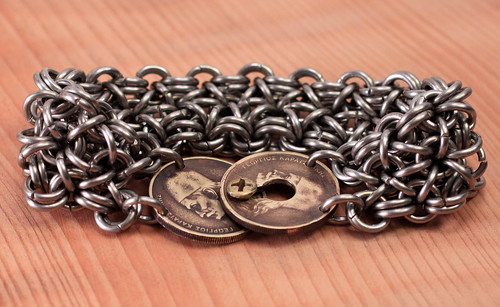
Another piece I soldered is the clasps for my chainmail bracelets. With these pieces I'm able to use my camp stove. I've been using coins as the clasps for these pieces. I have some coins that my grandma gave me from her travelings back in the day. I made one braclet using coins from Thailand and one from Greece, these coins look great outright but with the patina I gave them and sitting on the chainmail bracelet make them look amazing.
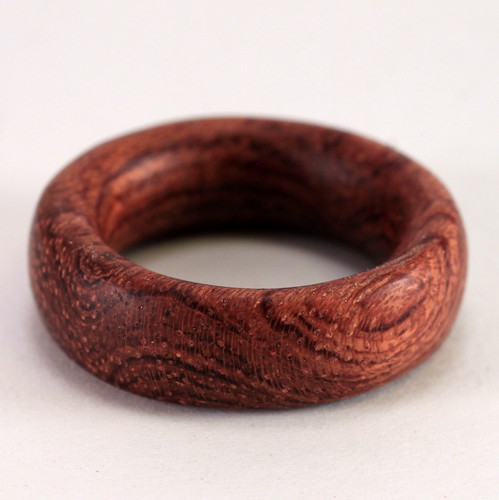
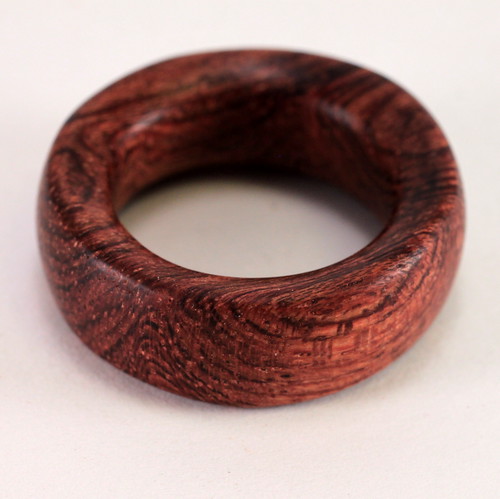
I've also been making some wood rings. These are fairly strait forward and easy to make and it a good way of using up small scraps of wood I have. I decided to make some varying sizes and will probably replace each size as they are sold.

And last, but not least, it this long etsy post are some rubber bracelets that were salvaged from some old camera lenses. You know all those lens pendants I've been making? Well all those lenses came from old camera lenses. So along with having a bunch of lenses I have a ton of random lens body parts lying around. Some of which are the perfect size to be used as bracelets. Like these two.
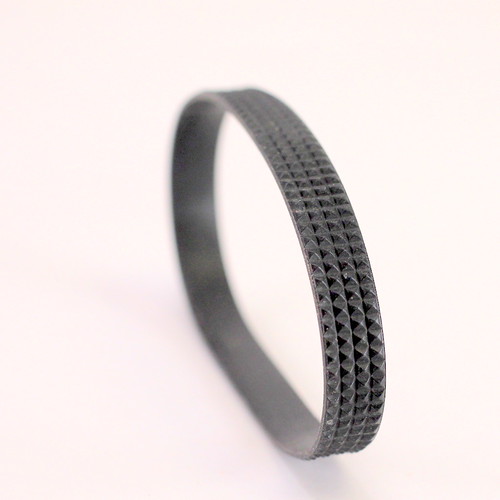
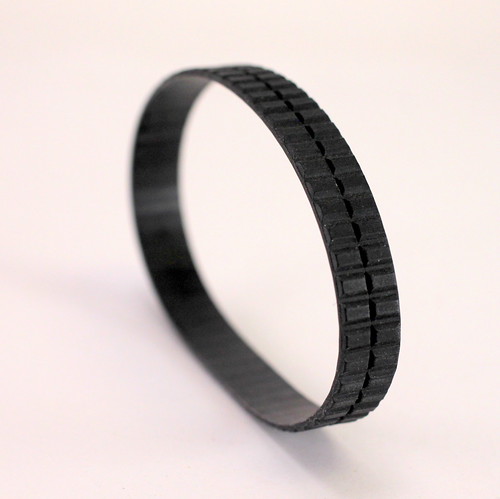
They are the focal grips from the old lenses that I took off and cleaned up a bit. These along with everything else in this post can be found right now in my Etsy Shop.
No comments:
Post a Comment