Oh Hey
Well I haven't blogged in awhile and I guess I should share with you just what I've been up to the last few weeks. Squares, lots and lots of squares. Gluing, cutting, sanding, taping, hot gluing, taping, positioning, fiddling with squares.
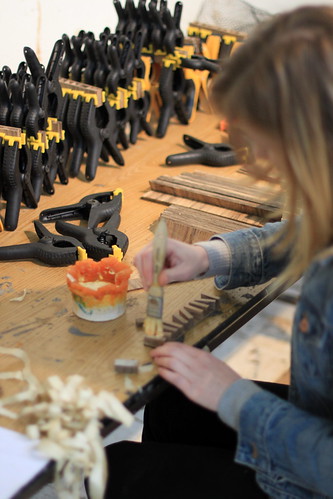
You can see Helen here gluing together the cut out pieces of wood. Each square is shaped slightly differently so we are able to form them to the complex curves of the form.
Here is a time lapse I made of myself gluing together a bunch of them. A few people spent weeks doing this to make all the squares that we needed. I don't think anyone really counted how many there exactly were but I assure you it is an ass load. The small squares seemed to be what took the longest to make and they actually only make up a small part of the piece.
Once the square blanks were glued together they then needed to be cut. I spent weeks doing this as well. Hours and hours cutting squares, then once they are cut then needed to be sanded to true them up, each square was sanded on all sides to true them up.
Once they were cut out and sanded they then had masking tape applied to both sides. This was done so when we cast the resin the insides of the squares wont fill up with resin.
In this video you can see me taping a bunch of squares, you can also see Midori applying tape to one of the large molds which the squares would eventually be hot glued to. You can also see Helen eating a cookie.
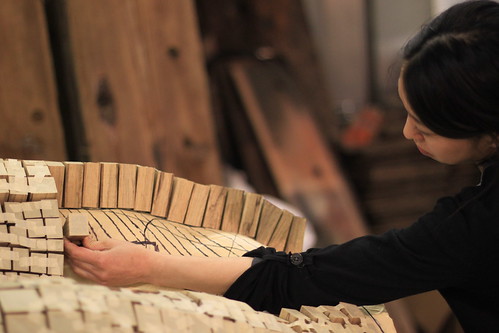
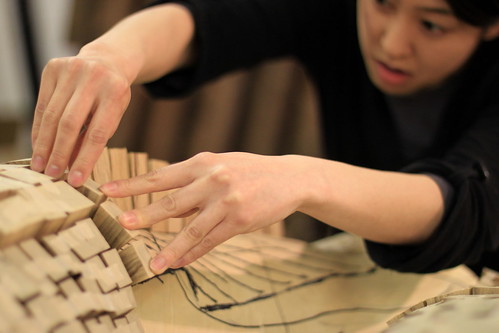
Ok, so then we had all the squares glued, cut, sanded, and taped. Then then needed to each individually be placed on the forms. The squares were separated by size, height and wood color. There are sections of the same size squares that blend together going from large to small and every thing in between. There are also patches of dark and light wood.
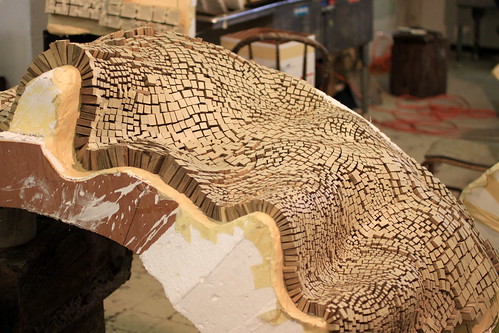
Here you can see one of the forms that is covered with squares, there are a lot of smaller squares on this piece, it took a lot of work. Hours and hours of hot gluing. Each square is separated by a small gap they you try and keep consistent for each square on all four sides and from the top and bottom. It can get a little tricky in some of the peaks and valleys and you spend a lot of time looking for the perfect square to fit. Some times it's like playing with legos as you are digging through a box of squares looking for the right one.
Here you can see a side profile of the squares going up and over a curve. You can see how all the different shape squares are used to make the curve.
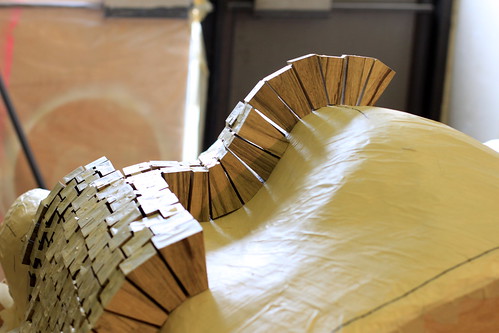
It just took lots of time and patience to place each square.
And some concentration as well.
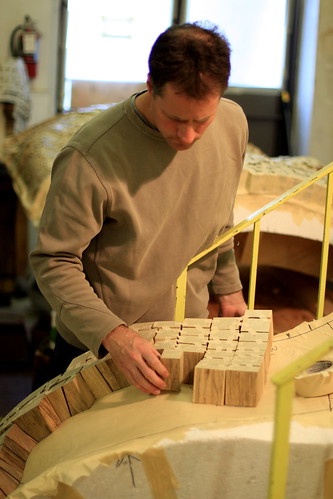
Placing the big squares was always satisfying. You can cover a large area in a short amount of time.
Once we had all the squares placed we then sealed all the edges with tape and placed fiberglass cloth over the whole surface.
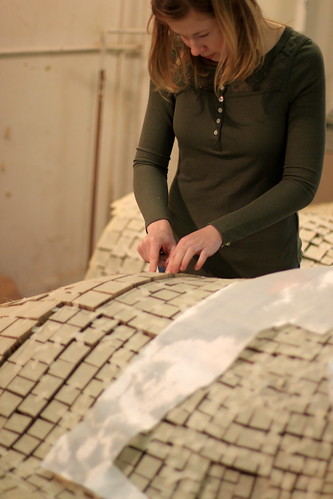
It's not as exciting as it looks.
You can see where there are small holes cut in the cloth, that is where resin will be poured in and also where air will be allowed to escape.
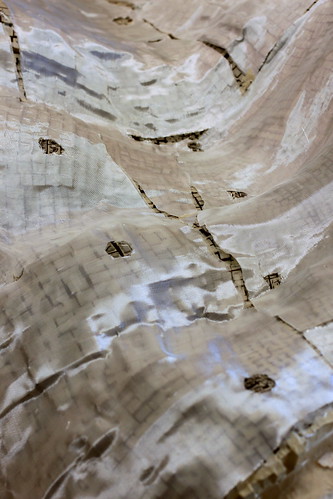
We then brushed resin over the cloth to seal the squares and form a shell over the form.
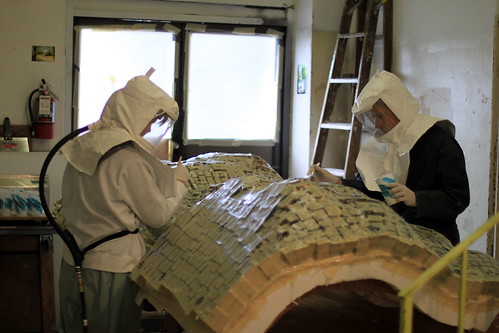
These are our space suits, they feed us clean air so we don't have to breath the resin fumes all day.

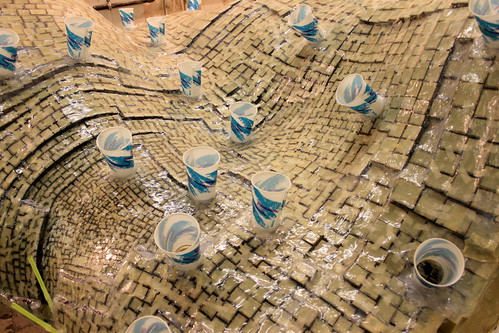
You can see the resin formed a shell over all the squares. All the cups are where we will pour resin in and it will then flow between all the squares.
We then poured all the resin. It took about three days to pour in all the resin in all eight of the forms. We had a few leaks but over all it went fairly ok.
Here is a short video of John and myself pouring resin into two forms. We then used lamps to check for leaks and also to help the resin heat up and start to harden. The quicker we could set off the reaction the faster it would harden and the less likelihood we would have leaks and also help prevent the resin from seeping into the squares.
Yesterday we started to take the outer layer of the forms off to see just what we had underneath. It turned out to look pretty good. There were a few squares that filed up with resin but not as many as was feared could.
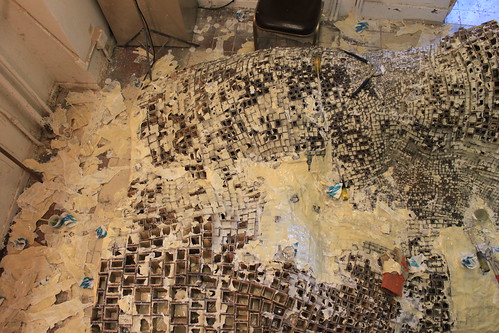
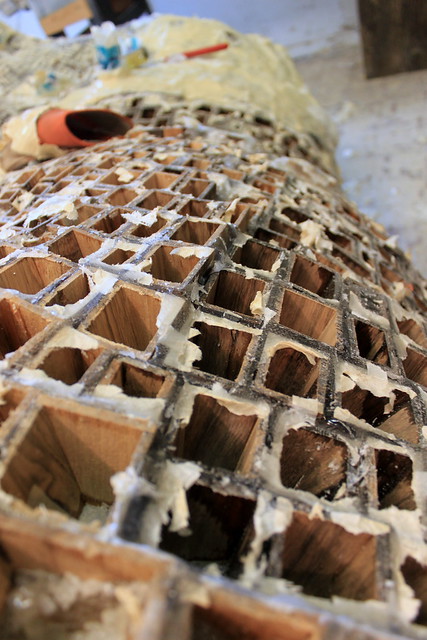
Now the real fine tuning comes in. We need to grind down all the squares to they are even and smooth, then all the air bubbles in the resin need to be filled, the squares that filled up need to be chiseled out and a bunch of other small things. We also need to then connect each of the forms together by placing them back together and filling in the gaps. So there is a bunch more work that sill needs to be done so if you don't hear from me for another week or two now you will know where I am.